Introduction to Pipeline Dataset
What is Pipeline?
The pipeline is a new type of dataset added to the AIV Application. Users can Define relationships between different data sets and as well as tables with user-friendly UI. With Pipeline, no SQL knowledge is needed to provide join between tables and datasets available in AIV. Earlier, joining Tables to get combined data from various table users has to write SQL Queries and it requires a good understanding of SQL Queries to do so. One who knows how to write SQL Queries can only able to get data from sources so Business users are dependent on a person who knows SQL. It is no longer the case when you use Pipeline to fetch data and apply joins between tables with the drag and drop facility provided in Pipeline.
User can also provide joins between datasets that are already created in AIV
It is not advisable to use a single dataset or table to create a pipeline. There must be at least 2 nodes with at least 1 join between them.
Prerequisites
To create a Pipeline, you need working Datasets (JDBC) and a list of tables and views.
With Initial release, the user can join only the dataset which is created JDBC source
A Sample Pipeline view is as shown in the below image,
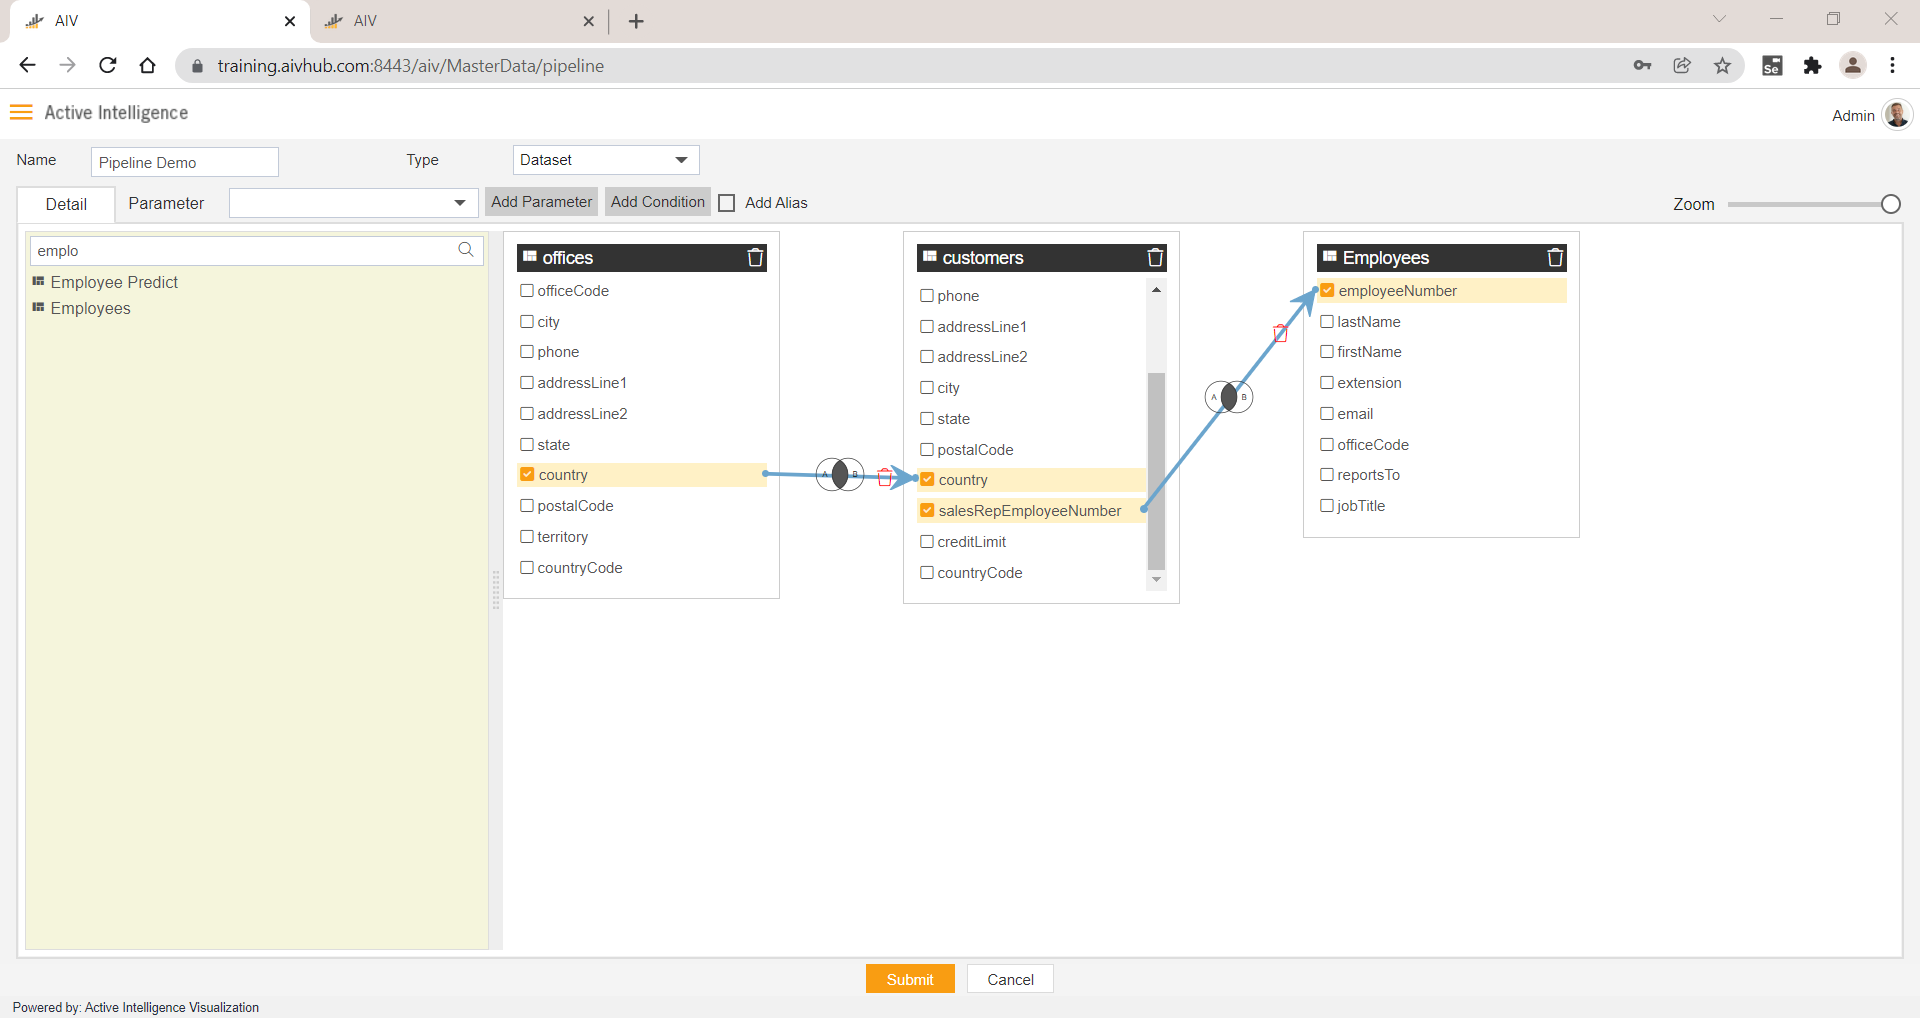
Let's Understand Basic Terminologies of Pipeline;
Create Pipeline
The pipeline can be created from the dataset section itself. In the dataset section, you can see create pipeline option in the footer menu as shown in the image below,

When you click on create Pipeline option, a new blank grid window will open. You can see the view as in the below image;
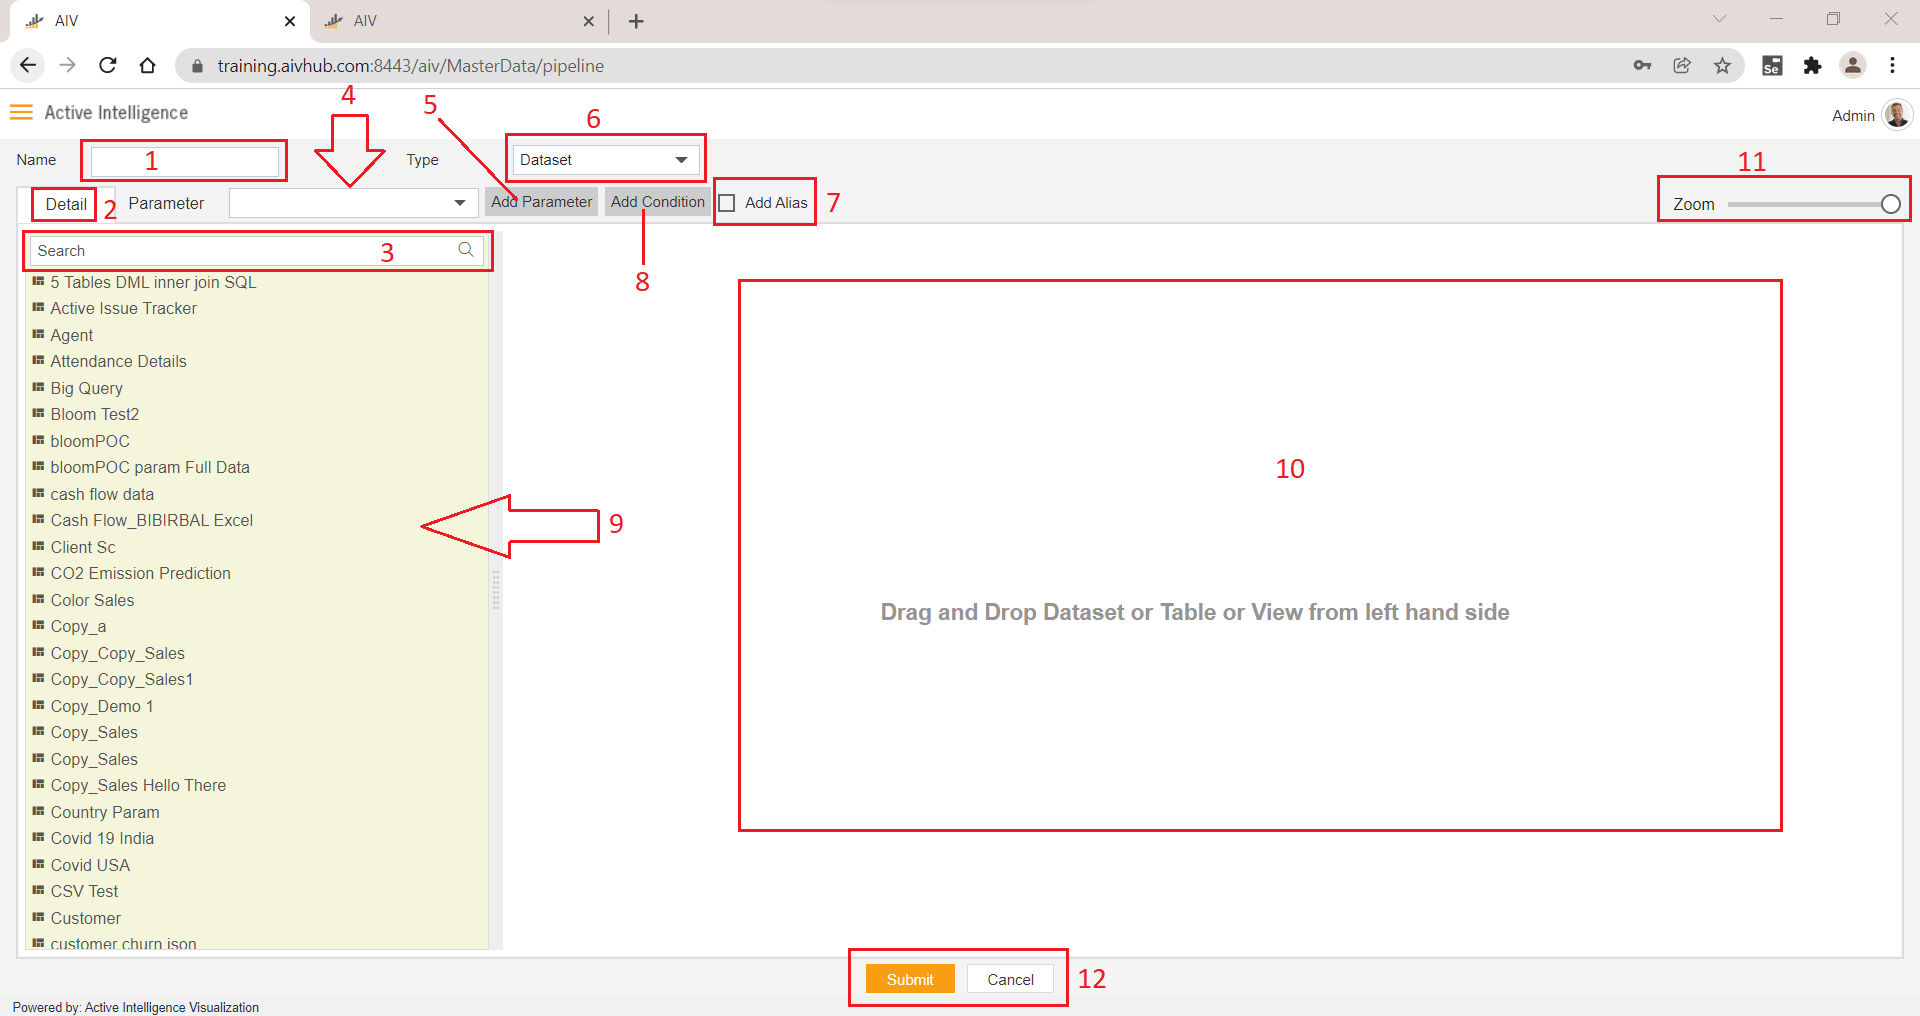
1. Pipeline Name
- Users can provide a unique name for the pipeline in the Name Text field
2. Detail Tab
- The detail tab contains information on the list of datasets created or tables available for logged-in users.
By Default, the detail tab shows a list of datasets(.ds) available in the dataset section. To get the list of tables available you need to change the type from Dataset to Tables and views which will be described later in this document.
3. Search Box
- User can find the required dataset, tables, or views by searching through this search box
4. Parameter
- Created parameters are listed here, You can see here language parameters also.
In the Initial release, language parameters as not supported. It will be available in subsequent releases.
5. Add Parameter
- User can add parameters to the pipeline dataset by creating parameters from here. This is the first step of using parameters in the pipeline Dataset. once the parameter is created from here, the user can use this parameter in the pipeline later on.
In the initial release, the use of parameters was not supported. It will be available in subsequent releases.
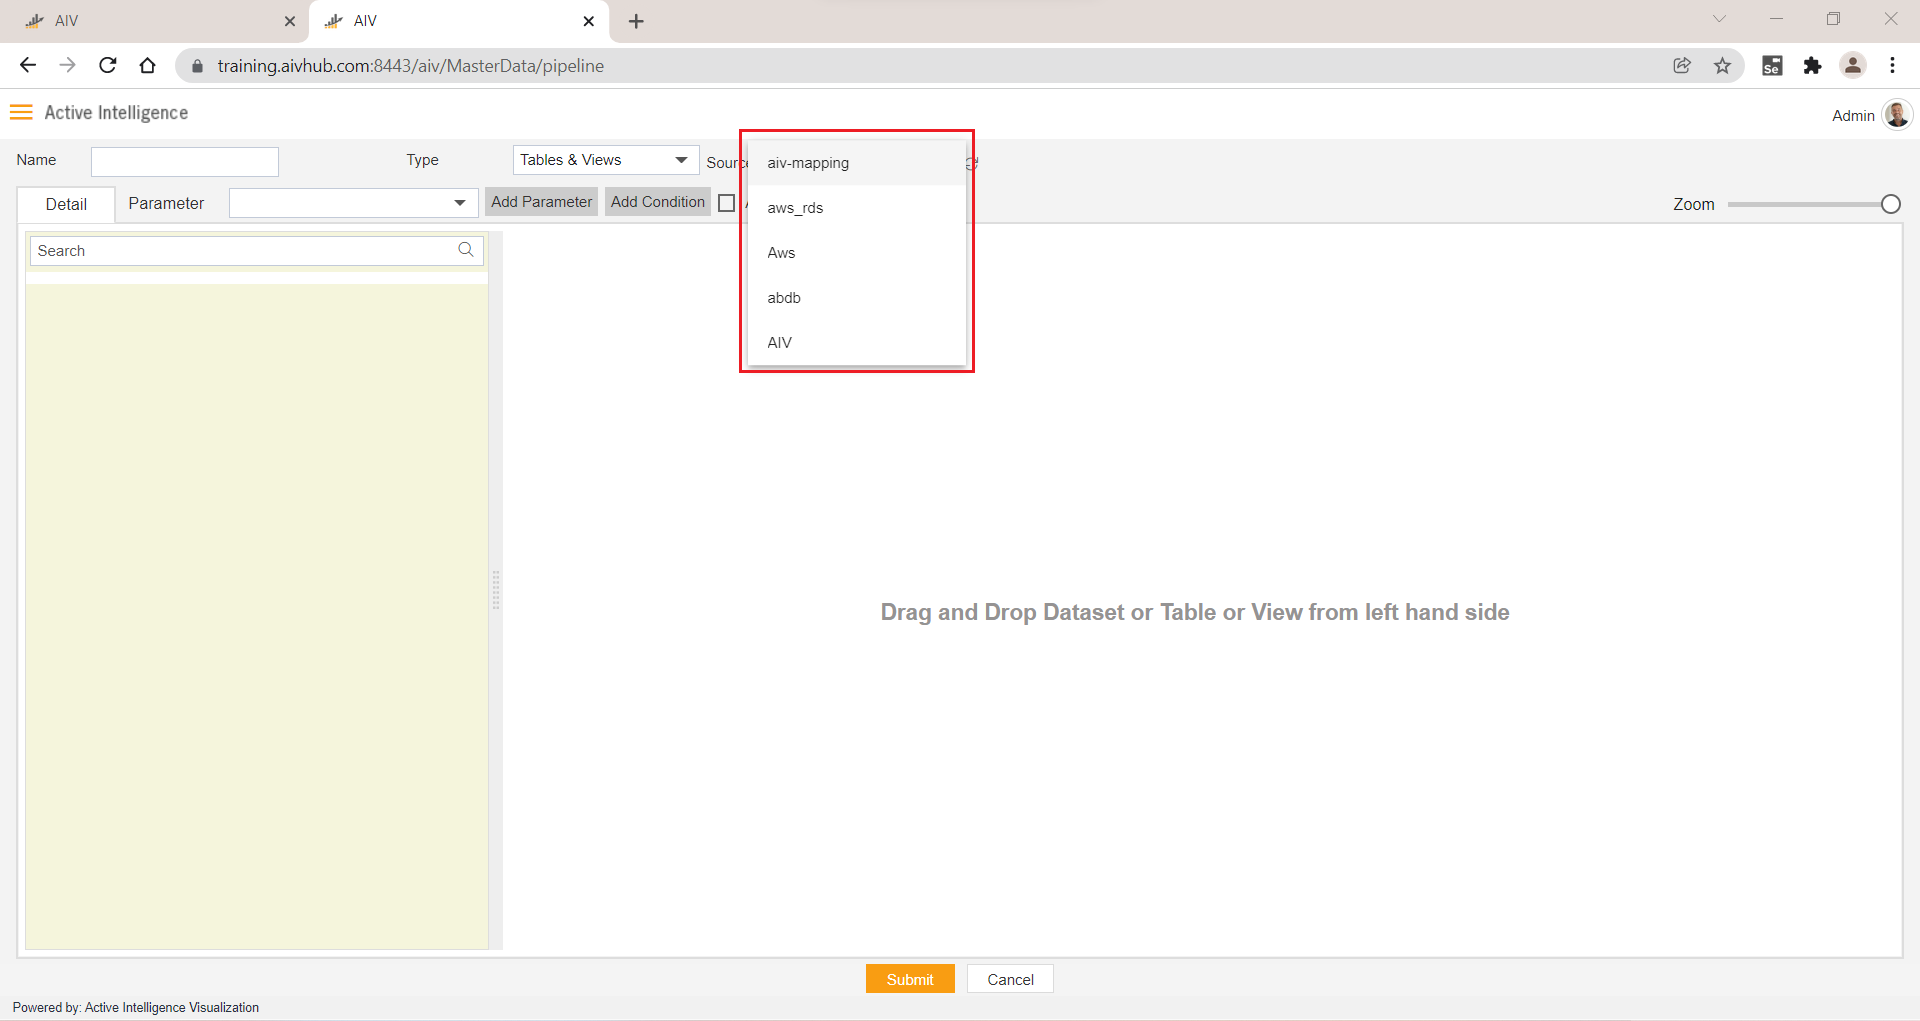
6. Source
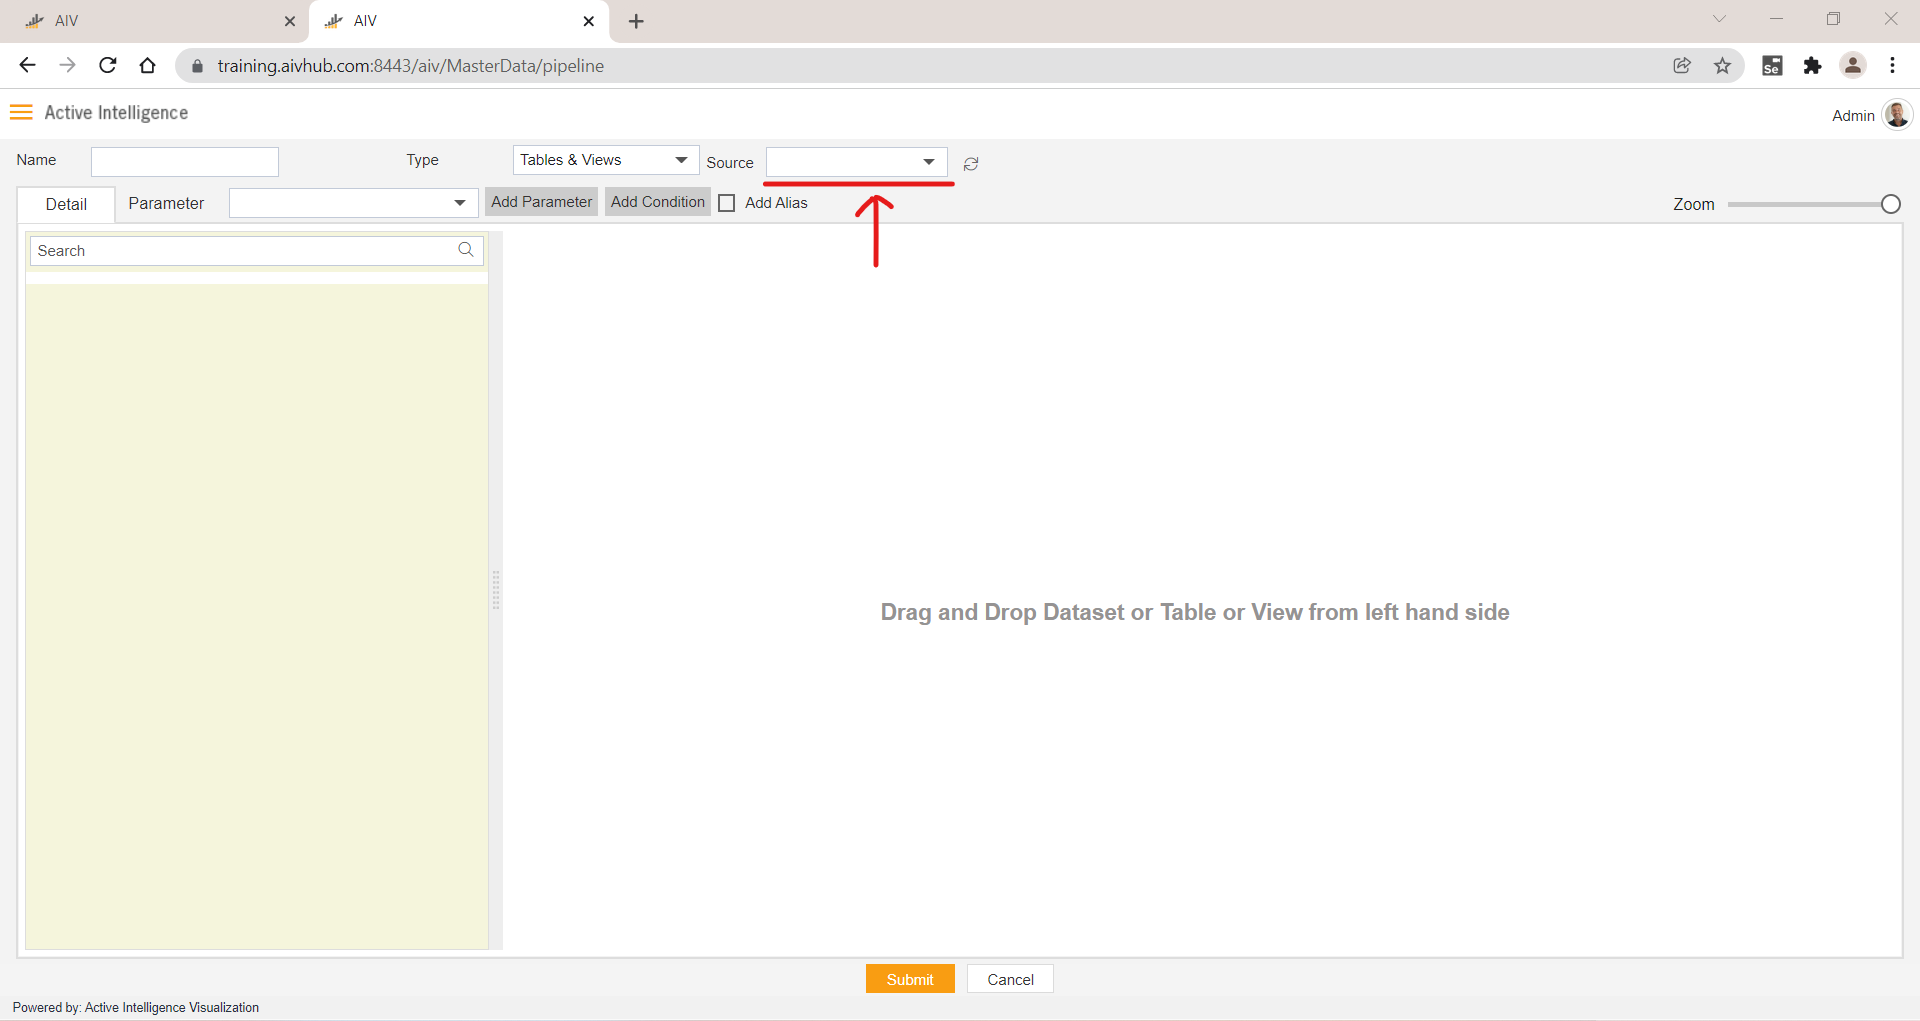
- By clicking on this Source drop-down, you can see a list of data sources available for logged-in users. Users can select data sources to get the list of tables & views from that data source.
- On the left-hand side, you can see a list of tables and views are displayed in detail list as shown in the image below,

7. Add Language Parameter
In Aiv user can add Language Parameter by clicking on the checkbox of Add Language Parameter, In Language, parameter user has to use Parameter dataset.
In the initial release, this feature is not functioning, It will be available in subsequent releases.
8. Add Condition
User can apply one or more conditions to the Results of the data. Conditions can be applied in case output data has to be filtered by one or a group of conditions. It is a way to get selected data in the output.
Just like Parameters, Conditions need to be created first from Add Condition button and then will be used inside the join condition.
Once we click on add condition, it will show create condition window as in the below image,
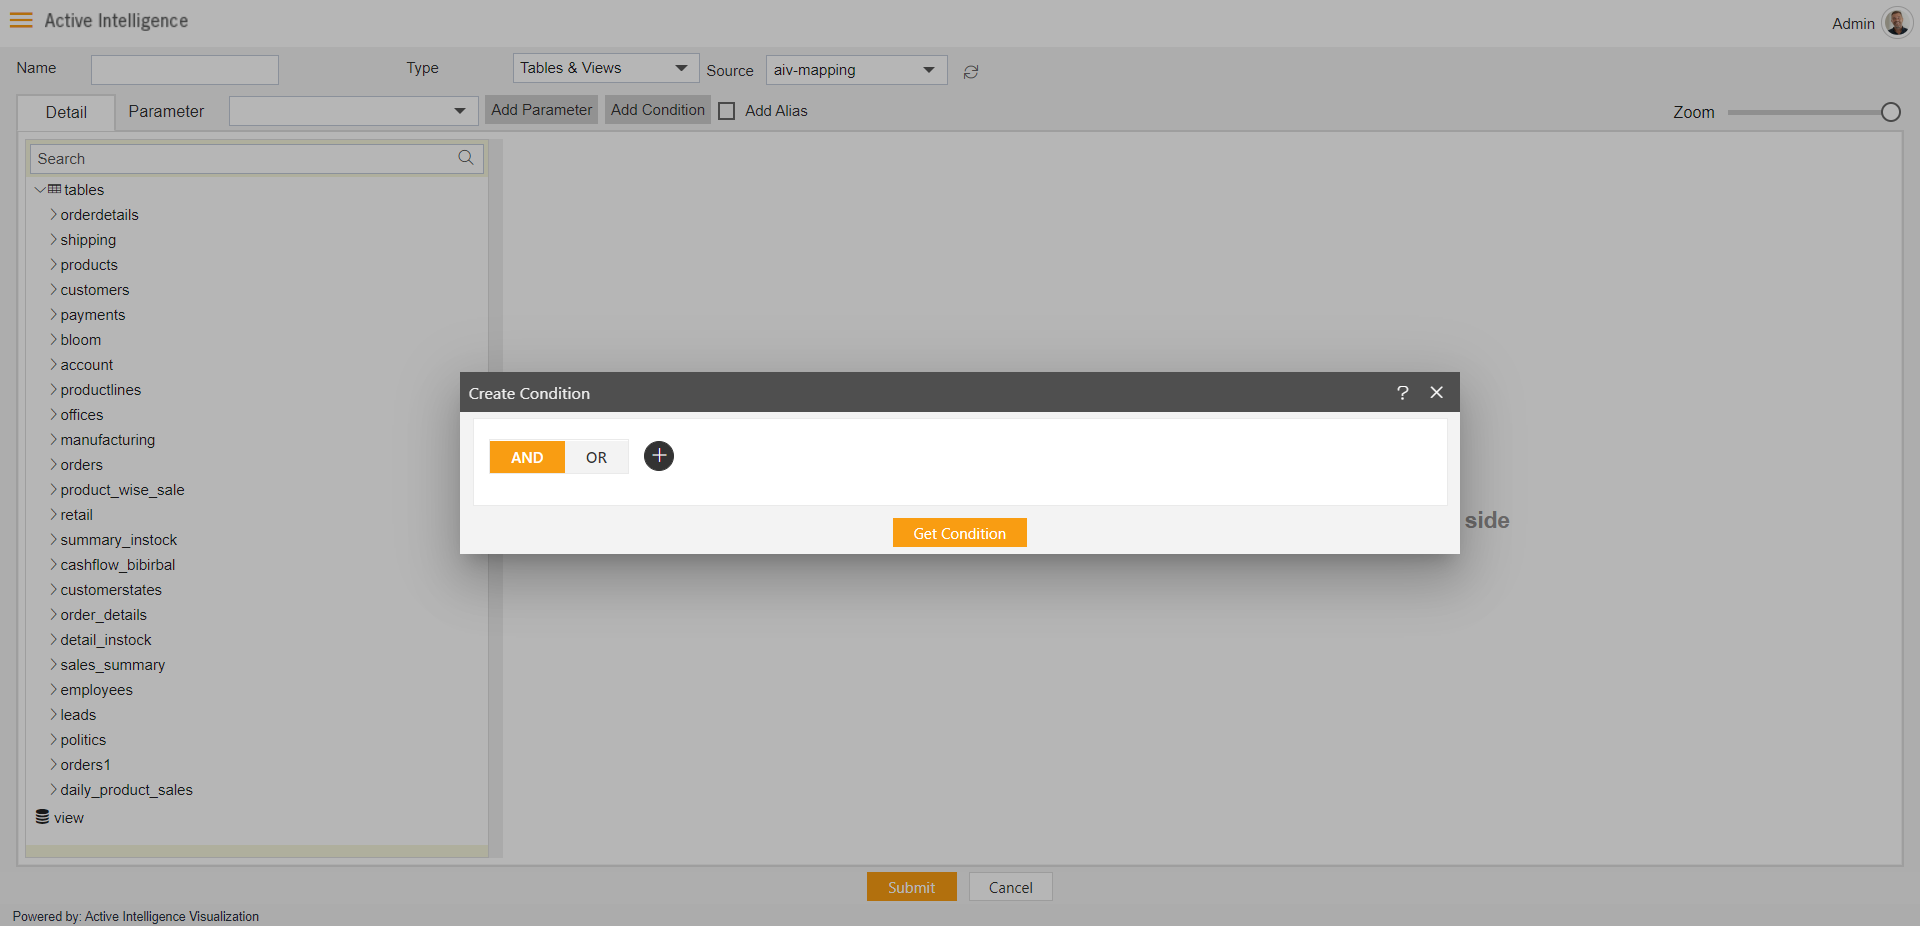
Join conditions can be seen when the user will apply joins between nodes. This point will be described later on in this document.
9. List View
- List view shows a total list of datasets when selected
TypeDatasetand shows List of tables and views ifTypeisTables & Views
-From here user can drag and drop the required dataset, tables, or views into the Pipeline Grid window.
10. Pipeline Grid Playground
All the join and logic building operations on tables, views, or datasets will be performed in this Playground.
User just needs to select the dataset, table, or view and drag it into this playground to proceed further.
Node
- When users drag and drop datasets or tables or views inside this playground, you can see a list of columns available in the selected dataset, table or view will be displayed. Just select the required fields and click on Submit.
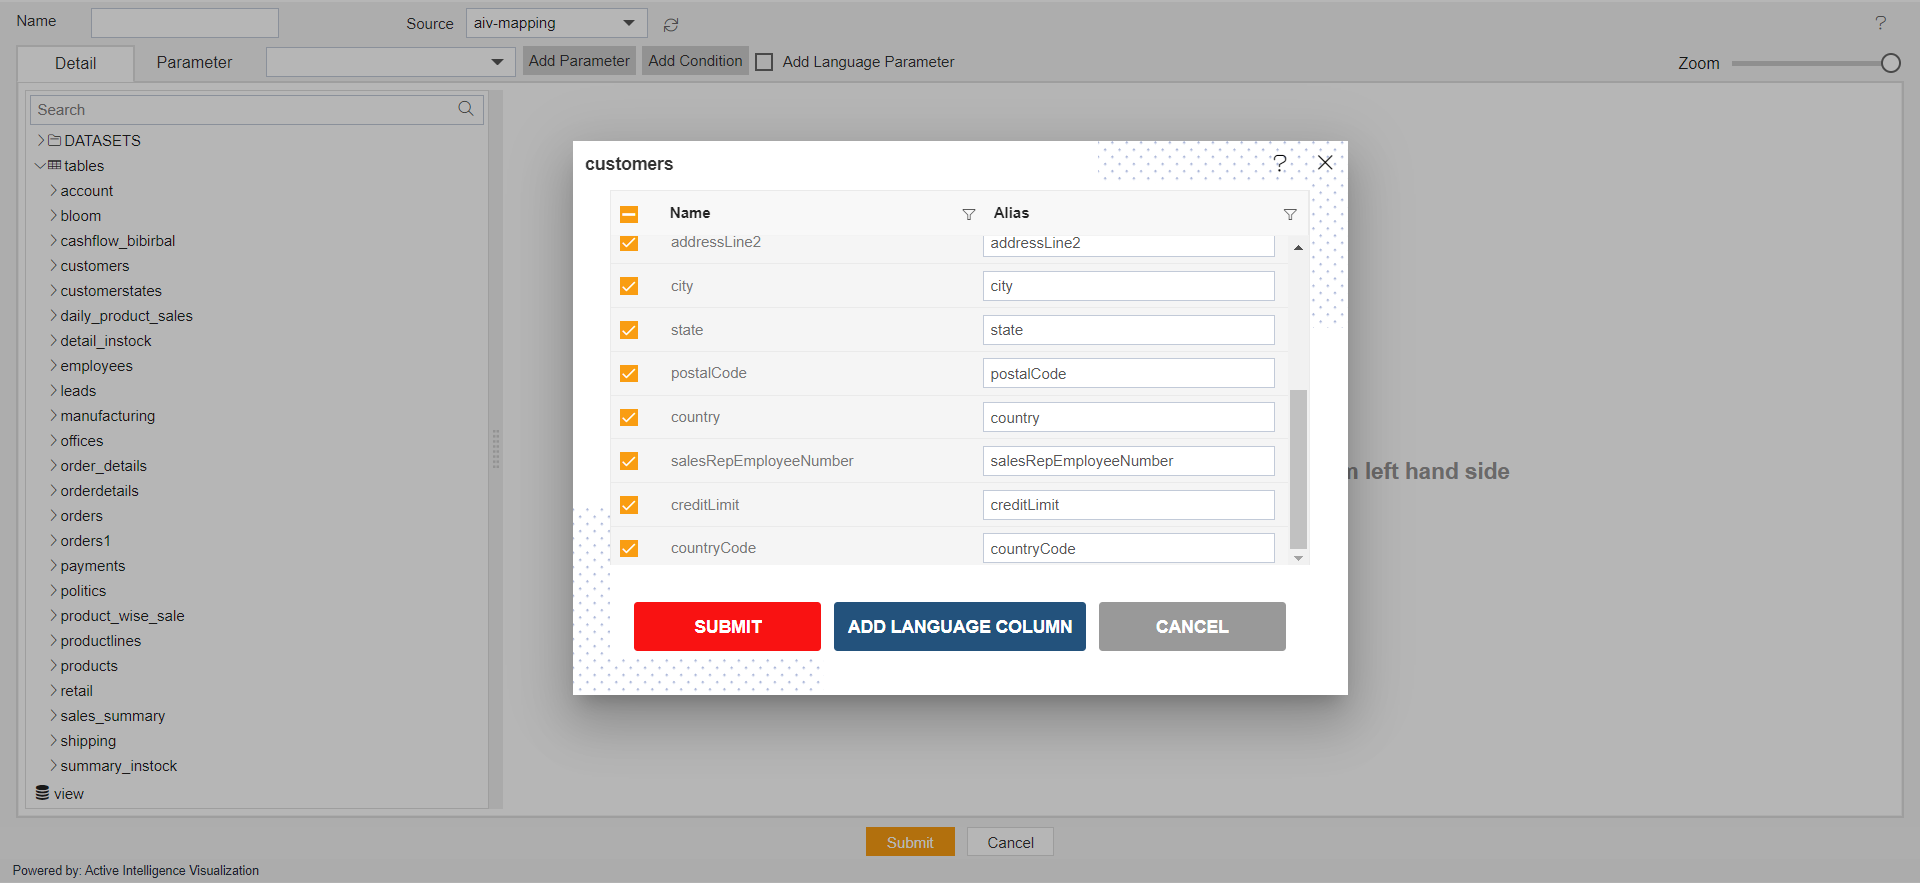
By default, All the columns will be selected in this window. But, users can add a selected column by deselecting them from the list
- You can see the table or dataset name on the top left side of the column list window
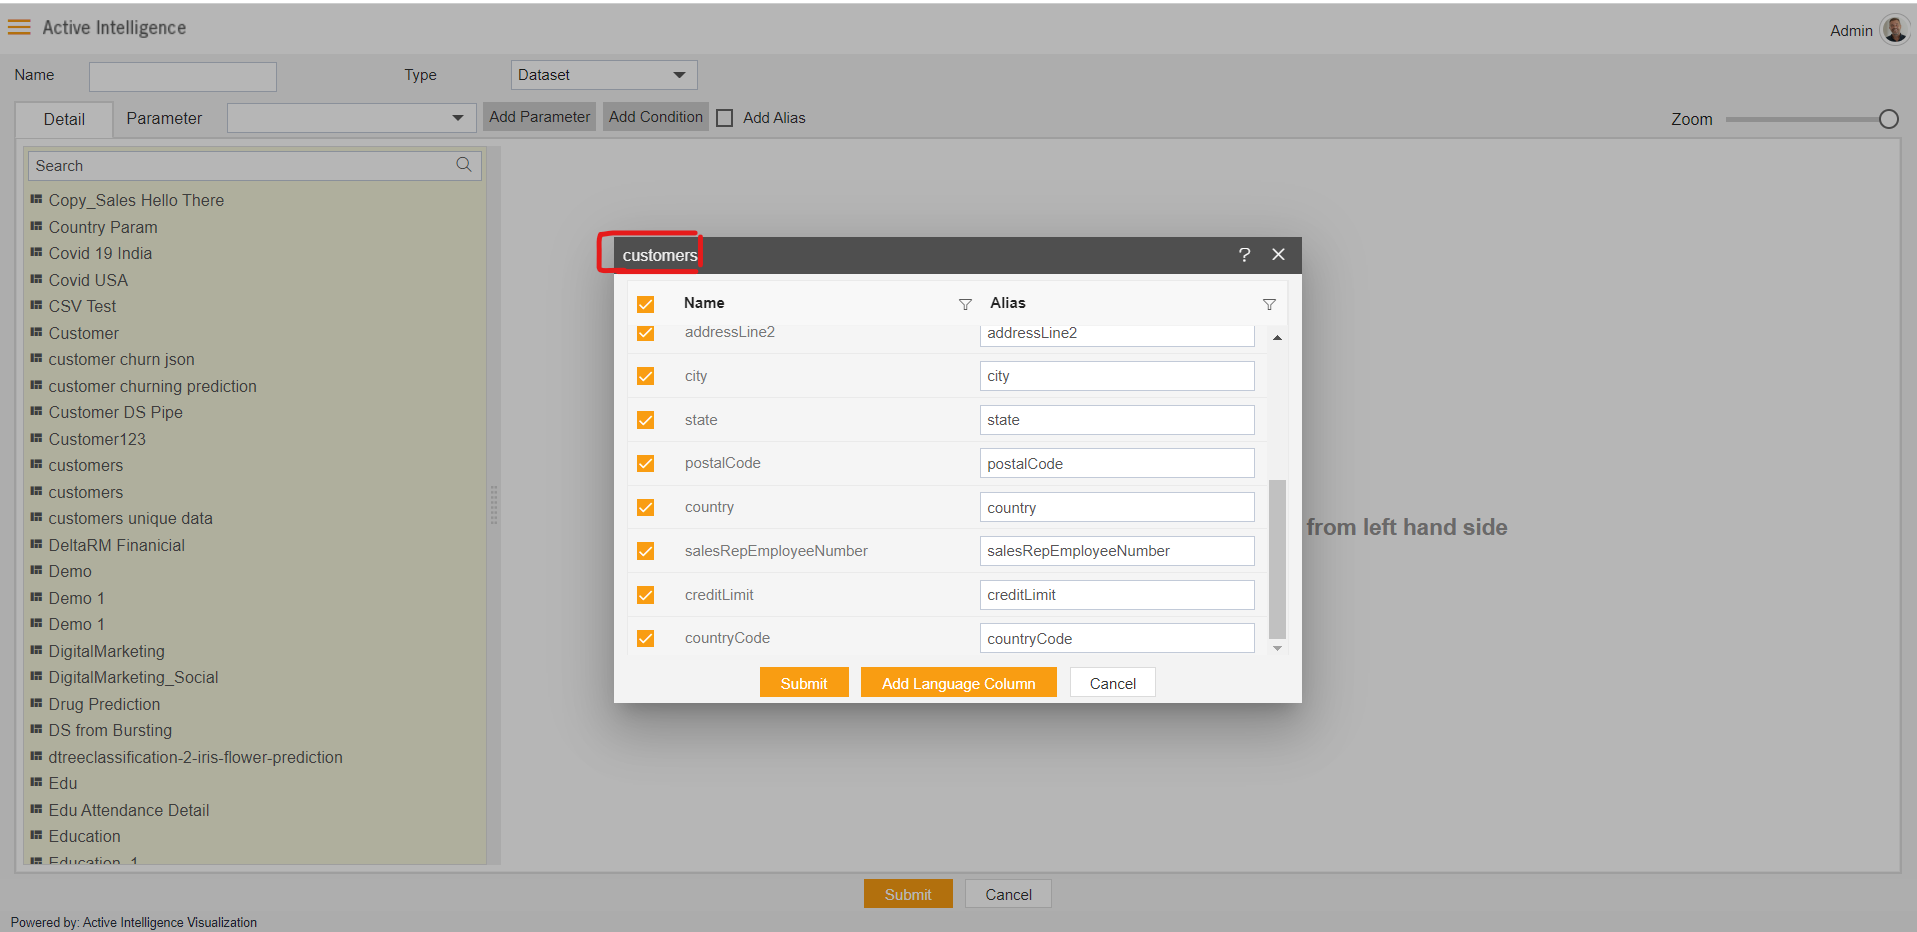
After clicking on submit button, Box will be added to Playground which is what we call a Node.
Similarly, the user can add as many nodes as he wants in this playground by just the drag and drop function.
Users can not add the same node more than once in the playground
Make sure that number of nodes added should be interconnected with each other in any manner. Otherwise, it will not give you the output.
11. Zoom in and Out
Zoom in and out operations in the pipeline playground can be performed with this slider. By default zoom value is 100 % and by dragging it to the left side zoom out operation will be performed and the node view gets smaller.
A slider can be useful in case there are many nodes added to the playground and the user need to check linking with different nodes in a single view.
12. Submit and Cancel
- Created pipeline and settings applied can be saved by clicking on Submit button given at the bottom-most of the window.
- By clicking on the cancel button, changes made will be discarded 2918/600 Your text was partially checked. Go Premium to correct longer texts. Rephrase