Embed Dashboard Overview
- The Embed link in HTML is used for embedding external applications which are generally multimedia content like audio or video into an HTML document. It is used as a container for embedding plug-ins such as flash animations.
Only users with Dashboard privilege have access to this section!
Read 5 minutes tutorial here.
1. What is Embed Link?
- Talking about the Embed link in terms of the AIV application, you can place the required dashboard in your existing website using the Embed link on the dashboard.
2. How to get an embed link of a dashboard from the AIV application?
- There are 2 ways you can generate an Embed link of the dashboard, 1 from the Dashboard list view and 2 Directly from the dashboard edit view. Let’s go through both the ways one by one.
Get Embed link from Dashboard List view:
login to AIV using system credentials.
Click on the hamburger menu and you will see a List view options icon just the right side of the (+) icon in the dashboard section.
Once you click on list view it will show you a list of dashboards available in your repository for that logged-in user.
Search for required dashboard in list view.

Click on that dashboard to select dashboard. You will see the checkbox Is marked.
Click on 3 vertical dots on the left of the dashboard name, select the embed option.
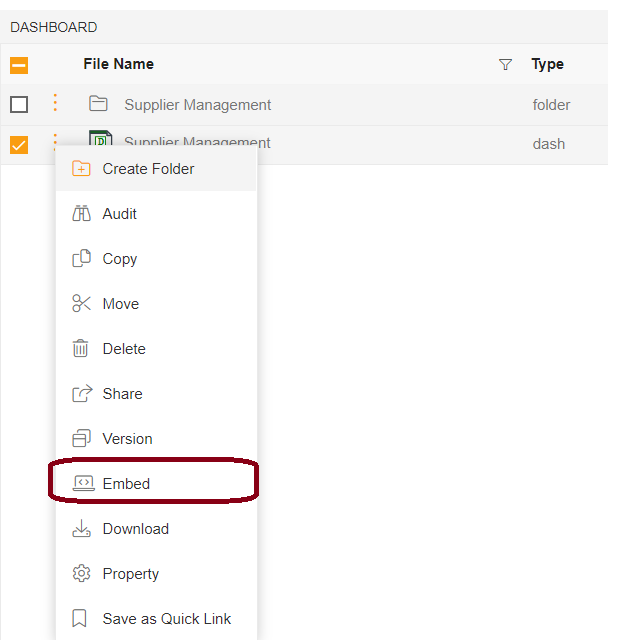
You will see an embed window that will open with various options. All options description is as under:
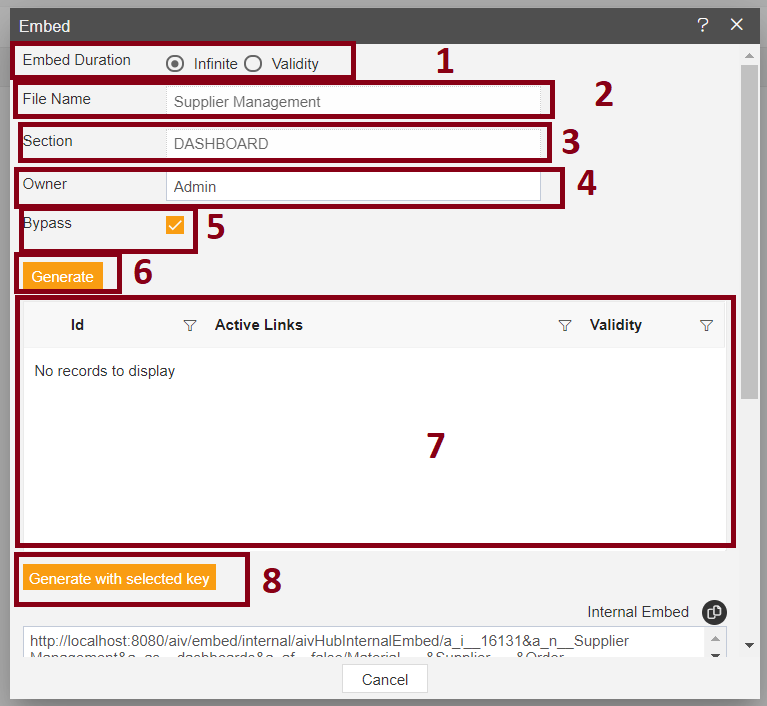
- Embed Duration: with this option, you can select duration up to when this link remains active. There are 2 options,
(1) Infinite: which is by default selected. When using this option, the validity of your dashboard embed link will never end.
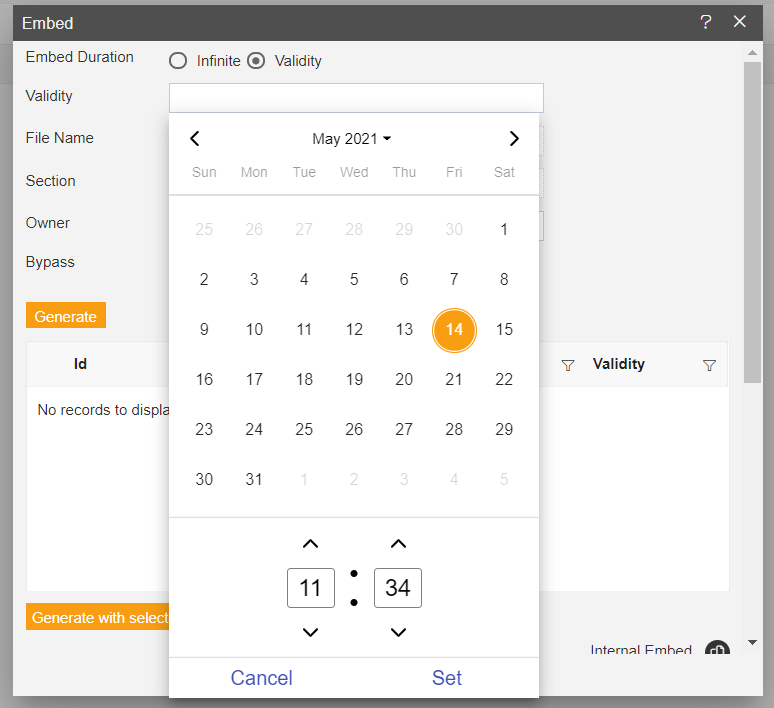
(2) Validity: Use this option when you want this link to expire at some point in time. To do so when you select the validity radio button a new validity field is added just below the radio button where you can select the date and time when this link is supposed to be expired.
(3) File Name: This field is non-editable and shows the name of the dashboard.
(4) Section: this field is non-editable and shows dashboard section info.
(5) Owner: this field is non-editable and shows owner info on the dashboard.
(6) Bypass: when the user wants to bypass token info then the user needs to mark this checkbox. And when users need to use tokens for security purposes then this check box is deselected before generating an embed link.
(7) Generate: When clicked, an external embed link on the dashboard will be generated.
(8) Grid view: in this section, a list of generated embed links will be listed.
(9) Generate with selected key: this is used when you already have an embedded link and you want it to regenerate. Just select generated embed link from the grid section above this button and then click on this button. In this case, the dashboard ID will remain the same as in the previous link.
when you click on generate button, scroll down you will see the External embed link, and Embedded code will be generated.
user can use this External embed link to embed this dashboard into an external web application.
- Get Embed link from Dashboard Edit mode:
Search for the required dashboard and open that dashboard by double-clicking on that dashboard.
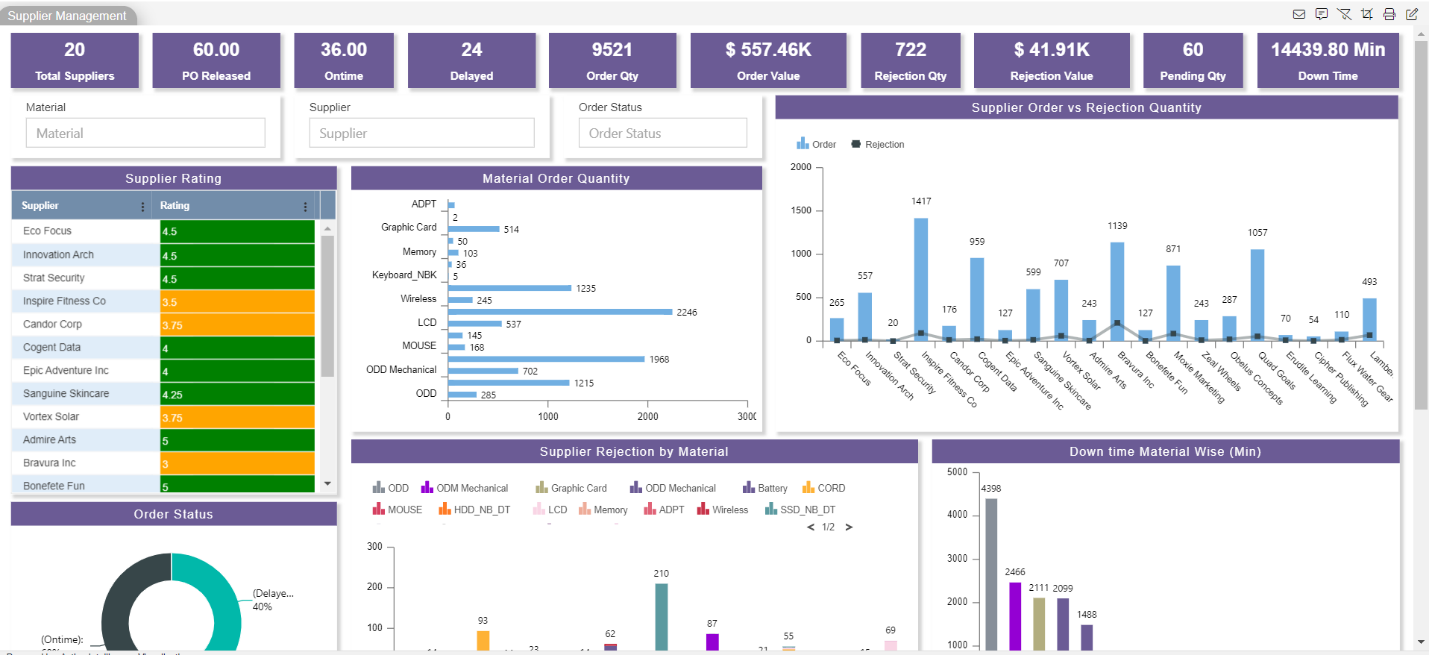
Dashboard will open in preview mode. For Demonstration purposes, we will generate an embed link from the supplier management dashboard.
Go to dashboard edit mode by clicking the edit icon available at the top right corner.
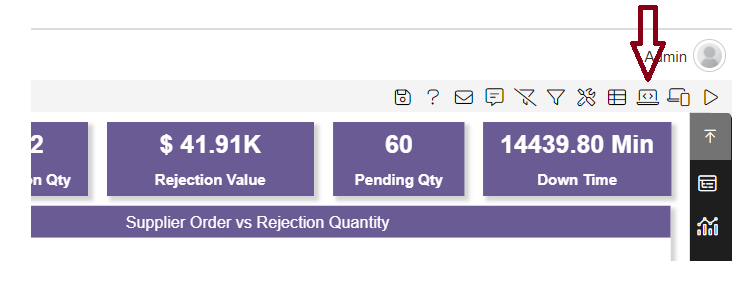
When you entered dashboard edit mode, you will see an embed icon on the top right corner as shown in the image below.
Click on this icon and you will see the embed window will open.
You can generate an embed link by referring 8th-step given in option 1.
The following topics will be covered under this section:-